
23 Aug Raising Mealworms
 Mealworms earned their place in western culture as an ideal protein source for birds and reptiles, as well as as fishing bait, and for their ease of care.They are not picky about humidity, temperature or food source, and are inexpensive to purchase.
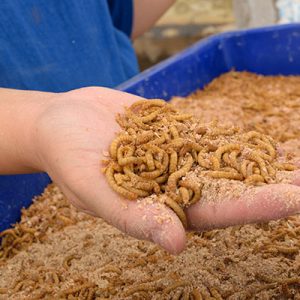
A simple approach to raising mealworms is to use a plastic tub (length and width are more important than height), add a 2 to 3 inch layer of oatmeal or wheat bran and add mealworms purchased at a local pet store or ordered online (to be on the safe side, house mealworms purchased for pet consumption for several weeks to allow previous feed, which may have been enhanced with vitamins and minerals for reptiles to exit their system). The worms can be fed various vegetables, which are primarily used a hydration source. Voluminous vegetables such as potatoes and carrots are ideal. Room temperature is adequate, although temperature isn’t a huge concern; mealworms are incredibly resilient. We at EntoSense have observed mealworms survive below-freezing nights, and they appear unphased by very high temperatures and fluctuating humidity.
Those looking to sustain a mealworm colony for the long-term may wish to adopt a slightly higher-tech approach which will ensure mealworm beetles don’t feed on the eggs and developing pupae which will result in a higher yield of mealworms. This can be achieved through a simple design involving a plastic three-drawer organizer, wire mesh (window screen or metal mesh is ideal; mealworms may be able to eat through soft plastic mesh), duct tape, and a boxcutter. The procedure goes as follows:
Use the boxcutter to carefully cut out the bottom of the top drawer.
Secure the mesh over the space; duct tape the edges of the mesh (ensure the insects don’t have access to the sticky side of the tape as they will become stuck).
Apply oatmeal or wheat bran to the top two drawers, and add the mealworms to the second drawer.
Once the mealworms begin pupating into a white, grub-like creature (usually within two weeks of purchase), move them to the lowest drawer. The lowest drawer will harbor the pupae. By separating them from the beetles and worms, one doesn’t risk the pupae becoming the meal of their larval and beetle counterparts. This drawer does not require a substrate feed, but adding some may deter newly hatched beetles from feeding on their pupating kin while awaiting relocation to the top drawer.
The second drawer will house the larvae (“worms”). This drawer will need a substrate feed and vegetables. The top drawer, with the mesh bottom, will be home to the beetles. They too need a substrate feed and vegetables.
The tiered system has the benefit of allowing the beetle eggs to drop into the larvae container through the screen. This prevents the beetles from feeding on the eggs, increasing yield. The larvae will hatch in the larvae drawer. When the keeper notices pupae, he/she transfers them to the pupae drawer. When the beetles hatch, they are transported to the beetle drawer to give rise to the next generation.
Pro tip: To maximize yield we also recommend using a largish container (24” by 12” or more) and starting with at least 500 (ideally 1,000+) mealworms. Although carrots and potatoes should be stables, a variety of fruits and vegetables should be offered. Avoid overly juicy fruits, like plums, as they can promote mold and are unlikely to be eaten. Remove old, dried, or moldy foods. Deceased beetles and mealworms molts need not be removed; they will be consumed by others in the container.